Blender Product Animation: How a 10-Second Product Ad Is Built
A short product ad in Blender is mostly decisions made before the first keyframe. This guide walks through the order Animate & Create teaches: hero shot, model, surfaces, light, camera, timing and finish.
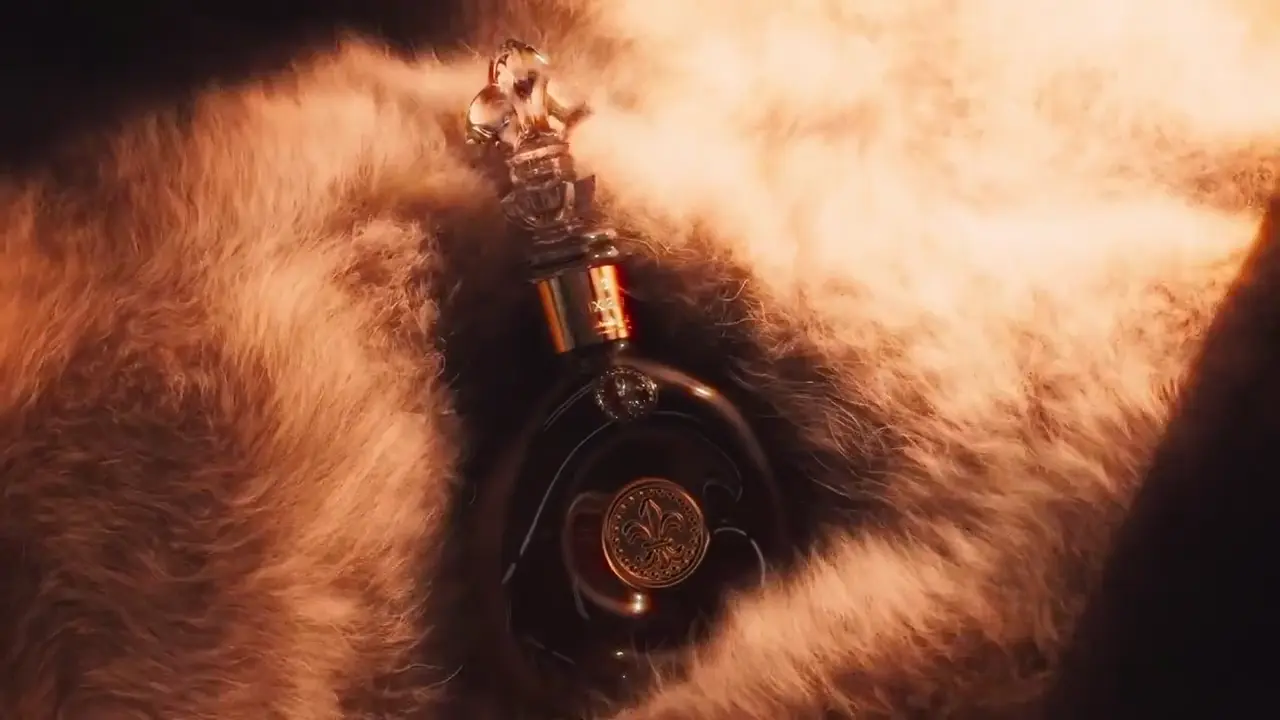
Blender Product Animation: How a 10-Second Product Ad Is Built
A 10-second product ad in Blender is built in a fixed order: choose the hero shot, prepare the model, build the surfaces, light for shape, move the camera with intent, time everything to sound, then render and finish. Most weak product animations skip the first step and spend hours polishing a shot that never had a reason to exist. The software work is the easy part once the decisions are made.
This is the order the Animate & Create Academy teaches in its Product Videos track. Below is what each step involves and the mistakes that cost the most time.
Step 1: Pick the hero shot before opening Blender
Every short product ad exists to show one frame: the moment the bottle catches the light, the sneaker sole flexes, the cap lifts off. Write down that frame and the one thing it proves (premium, durable, refreshing, precise). Everything else in the ad is there to set up or pay off that frame.
A useful test: describe the hero shot in one sentence a client could repeat. "A slow push past the logo until light rolls across the embossed glass" passes. "Cool shots of the product" does not.
Sketch three to five thumbnails, even as rough boxes, and number them. Ten seconds holds three to five shots comfortably. More than that and each shot is too short to read on a phone.
Step 2: Prepare the model
Product models arrive from CAD exports, marketplaces or a quick in-house build. Before any material work:
- Check real-world scale. Set the scene units to metric and scale the product to its real size. Light falloff, depth of field and physics all depend on scale.
- Apply transforms (Ctrl+A, All Transforms) so modifiers, bevels and textures behave predictably.
- Bevel every hard edge. Real objects never have perfectly sharp edges, and a 0.5 to 1 mm bevel is what catches highlights. A Bevel modifier with limit method set to Angle handles most products.
- Check shading. Use Shade Auto Smooth (or smooth by angle) and fix any dark smoothing artifacts before lighting, because lighting will make them worse.
- Test the label. Place the label artwork and view it at the size it will appear on a phone. If the text is not readable there, simplify the shot, not the label.
Step 3: Build the surfaces
Shoppers judge quality by surface. Glass, brushed metal, soft-touch plastic and printed labels each need their own treatment in the Principled BSDF:
| Surface | Main settings | Common mistake | |---|---|---| | Glass | Transmission 1.0, IOR around 1.45 to 1.5, roughness near 0 | Glass with no thickness; real bottles need inner and outer walls | | Liquid inside glass | Transmission 1.0, IOR around 1.33, slight overlap with the inner glass wall | A gap between liquid and glass that shows as a bright line | | Polished metal | Metallic 1.0, low roughness, color from the metal itself | Metal lit by nothing; metal shows its surroundings, so it needs things to reflect | | Soft plastic | Metallic 0, roughness 0.4 to 0.6, subtle Coat for gloss variants | Roughness so low it looks wet | | Printed label | Image texture into Base Color, slightly higher roughness than the bottle | Label glossier than the glass it sits on |
Check every material under plain neutral lighting before building the hero light setup. If a material only looks right under one light, it is not right yet.
For glass scenes in Cycles, raise transmission and total light bounces in the Light Paths panel. Too few bounces makes thick glass go dark.
Step 4: Light for shape, not for brightness
Commercial product light has three jobs: separate the product from the background, show the material, and guide the eye to the hero detail.
- Key light: a large Area light to one side gives soft, readable form.
- Rim light: a light behind the product traces the silhouette so it reads against a dark background.
- Reflection sources: long, thin Area lights (strip lights) placed where the glossy surface will reflect them. On bottles and phones, the reflection is the light.
- Negative fill: black planes beside glass objects create the dark edges that make glass look like glass.
A full breakdown of these setups is in the product render lighting guide.
Step 5: Move the camera with intent
A constant 360-degree spin is the most common product animation and the least effective. Each camera move should reveal one thing:
- Push-in: builds focus toward a detail such as a logo or texture.
- Slide: passes across the product to show length or a series of features.
- Partial orbit: 30 to 90 degrees, enough to show form change without losing the viewer.
- Rack focus: shift the focus distance from foreground to product to direct attention.
Shape the motion in the Graph Editor. Ease in and out on almost every move, and avoid linear interpolation unless the move continues off-screen into a cut. Real camera rigs have mass, so moves that start and stop instantly look like software.
Use a real focal length. Product work usually sits between 50 mm and 100 mm for flattering proportions. Wide lenses close to a product distort it.
Step 6: Time everything to sound
Short ads are edited to sound, so the animation should be too. Choose the track early and mark its beats on the Blender timeline with markers (M in the timeline). At 120 BPM a beat lands every half second, which is every 12 frames at 24 fps or every 15 frames at 30 fps.
Land camera moves, product reveals and cuts on those markers. Sound design, such as a soft impact on the hero frame, adds weight a picture alone cannot.
Step 7: Render and finish
- Motion blur on. Real cameras blur moving objects. A shutter of 0.5 (the equivalent of a 180-degree shutter) is a natural starting point.
- Denoise. OpenImageDenoise lets you render at lower sample counts. Check fine label text after denoising, since it can soften small detail.
- Render passes. Saving a multilayer EXR with separate passes gives you control later in compositing. The Blender to After Effects workflow covers this handoff.
- Finish. Grade, add depth, place type and a short end card. Then export each platform format; the one render, seven ads guide explains how to plan that from the start.
How long a 10-second product animation takes
Time depends on model quality, material count and render settings rather than ad length. A clean model with two or three materials can be lit, animated and rendered by an experienced artist in a working day. A product that needs remodeling, complex liquids or simulation takes much longer. Most of the time a beginner loses goes into re-rendering shots that were never planned.
Where to learn product animation in depth
The Product Videos track of the Animate & Create Academy covers each step above as a lesson: the hero shot, shape and scale, surfaces, commercial light, camera moves, timing to sound, finishing and cutting for every platform. Lessons teach through breakdowns of finished Animate & Create renders. The first lesson of the track is free. On Instagram, the Academy runs as Animate University (@animateuniversity); a DM with the word FREE puts you on the list for the free lessons.
When a launch needs the finished video rather than the skill, [Animate & Create](/) makes 3D product animation for brands, and pairs it with AI video production when a campaign needs generated scenes around an exact product.
Frequently asked questions
Is Blender good enough for professional product animation?
Yes. Blender's Cycles renderer, Principled BSDF materials and Graph Editor cover what product commercials need, and it is free. What separates professional results is planning, lighting and timing, not the software.
Should I use Cycles or EEVEE for product animation?
Cycles gives physically accurate glass, reflections and soft shadows, which matter most for premium products. EEVEE renders much faster and suits stylized work, previews and some motion graphics. Many artists block out and preview in EEVEE and render the final in Cycles.
What frame rate should a product animation use?
Use 24 fps for a cinematic feel or 30 fps to match most social video. Pick one before animating, because changing frame rate later shifts every keyframe and beat marker.
How many shots should a 10-second product ad have?
Three to five. Fewer feels slow on social feeds, and more leaves each shot too short to read on a phone.
Do I need a 3D model from the manufacturer?
A CAD file from the manufacturer saves time and guarantees accuracy, but it usually needs cleanup: fixing scale, smoothing, bevels and UVs for the label. Without CAD, the product is modeled from photos and measurements.
About the author: Brett Barber, Founder & Creative Director at Animate & Create.
Frequently asked questions
Is Blender good enough for professional product animation?
Yes. Blender's Cycles renderer, Principled BSDF materials and Graph Editor cover what product commercials need, and it is free. What separates professional results is planning, lighting and timing, not the software.
Should I use Cycles or EEVEE for product animation?
Cycles gives physically accurate glass, reflections and soft shadows, which matter most for premium products. EEVEE renders much faster and suits stylized work, previews and some motion graphics. Many artists block out and preview in EEVEE and render the final in Cycles.
What frame rate should a product animation use?
Use 24 fps for a cinematic feel or 30 fps to match most social video. Pick one before animating, because changing frame rate later shifts every keyframe and beat marker.
How many shots should a 10-second product ad have?
Three to five. Fewer feels slow on social feeds, and more leaves each shot too short to read on a phone.
Do I need a 3D model from the manufacturer?
A CAD file from the manufacturer saves time and guarantees accuracy, but it usually needs cleanup: fixing scale, smoothing, bevels and UVs for the label. Without CAD, the product is modeled from photos and measurements.